
Life As A Surfer
How To Fix A Surfboard Ding
Knowing how to fix your own surfboard dings is an important part of being a surfer. Fixing your own dings allows you to avoid waiting for a shop to finish your board and you can fix up old garage sale boards. It will also help you to better understand the construction and curvature of the surfboard which will help your overall knowledge of what is happening while you surf.
The process of fixing a ding with a proper repair kit can be a bit messy, but as you practice you will get better. Here is a basic guide to get you started.
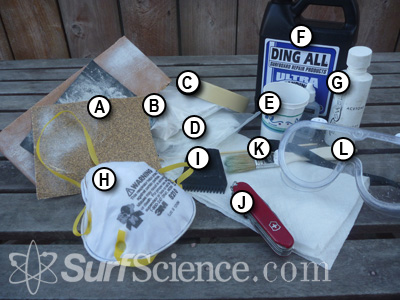
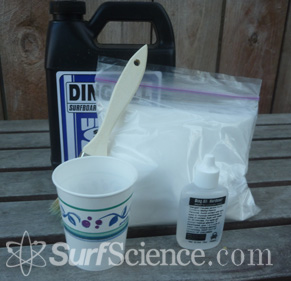
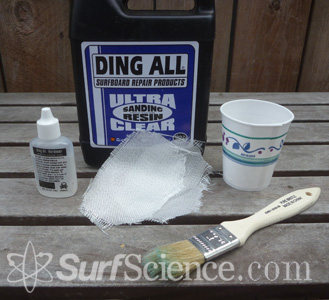
To fix your own surfboard ding you will need a few things. You can pick up most of them in a ding repair kit sold in most surf shops. Here is a list of what you will typically need and what it is used for:
A. Sandpaper - Smoothing board before & after repair
B. Fiberglass - Gives the repair strength
C. Masking Tape - Keeps the work area contained
D. Q-Cell - For filling in cut away area
E. Mixing Cup - For mixing resin & Q-Cell
F. Sanding Resin & Catalyst - Combine to make surfboard glass
G. Acetone - Cleans the board
H. Safety Mask - Safety first!
I. Wax Comb - Gets rid of wax in repair area
J. Knife or Razor Blade - Cut away loose foam or glass
K. Paint Brush - One way to apply resin
L. Safety Goggles - Safety first!
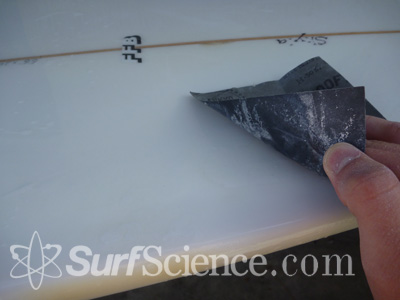
 2. Cut Away Damaged Area
The first thing you'll want to do is remove any rotten area. If the ding just happened, let the board dry and you won't have to cut away much. If you're fixing an old board, then there might be some rotten foam to cut away.
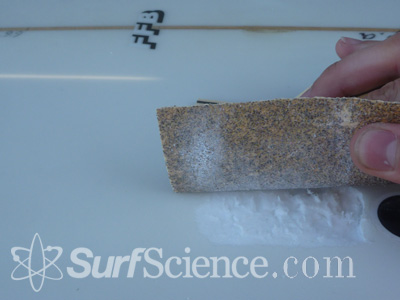 3. Clean & Sand the Working Area
Use the wax comb to get rid of any wax, use the acetone to get rid of anything else, and then sand the area down. You will want to use a low grit number like 30 or 60 which leaves the area rough. This will allow your repair to bond to the surface of the surfboard.
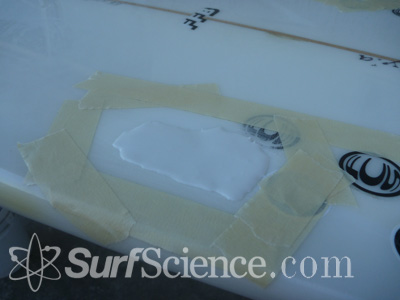
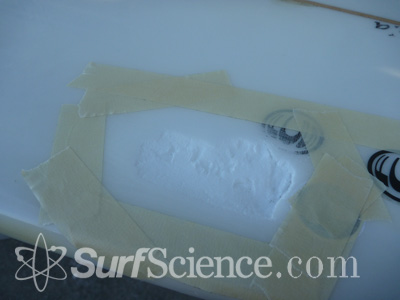 4. Tape Off the Work Area
This ensures your ding repair stays contained. You should now have a level, rough & clean surface to work with.
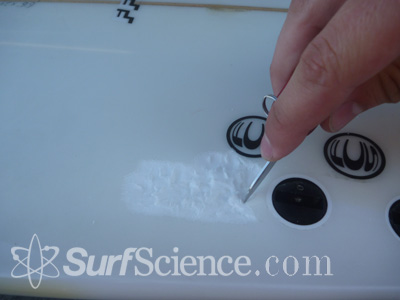
 5. Mix up some Q-Cell
This part is only necessary if you had to cut away some rotten foam. It will fill in the gaps and act as a foam replacement. 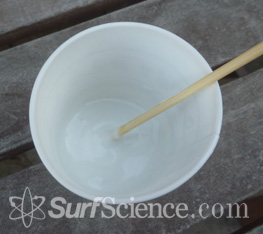 Place 1oz of sanding resin in a cup and then slowly ad Q-Cell while stirring. Eventually you will have a thick paste at which point you can add 10 drops of catalyst and after stirring, apply to your dinged area.
 6. Pour the Q-Cell
Take the paste you made and pour it slowly into the dinged area. Use a stirring stick to make sure it gets into any small areas and that you completely fill the ding. You will want to pour slowly to make sure you are not trapping air bubbles inside the Q-Cell which will leave empty space when it hardens. Pour so that it overflows slightly and sits above the surface of the board. That way you can sand it back flush.
 7. Sand Smooth
When the Q-Cell hardens, sand it flush to the surface of the board. As you get better, you will actually want to sand a little bit lower because you will be applying a resin coat on top of this and don't want the repair to bulge out.
 8. Cut Fiberglass & Mix Resin
Now its time to glass the repair. Cut to circular shapes out of your fiberglass sheet, one a bit bigger than the other. Mix 1oz of sanding resin with 10 drops of catalyst and stir. Wait a few minutes for the mixture to begin to harden and then apply.
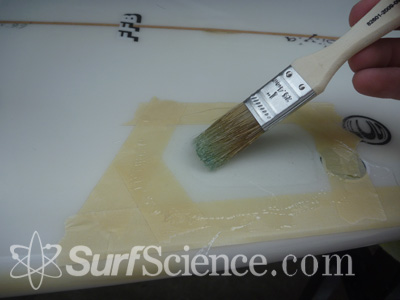 9. Apply the Resin & Fiberglass
Use your paintbrush to put a thin coat straight on the foam or Q-Cell. Place one sheet of fiberglass down, pour a bit of resin on it and let the fiberglass absorb it while making sure it spreads. Do the same with the second sheet of fiberglass. Make sure to spread the resin out evenly and that you have pressed the fiberglass sheets firm against the surfboard.
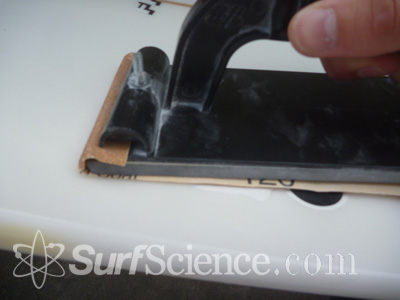
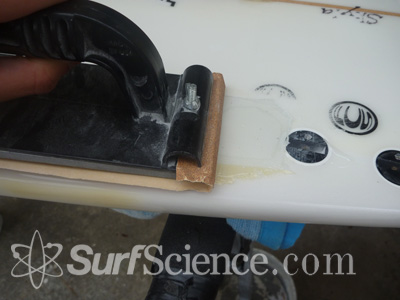 10. Sand Again
Once your resin & fiberglass have hardened you may begin to sand it. Make sure there are no bulges and smooth the edges so the repair begins to blend evenly with the board. Do not sand so hard that you begin to cut into the fiberglass sheet as this will sacrifice the strength of your repair.
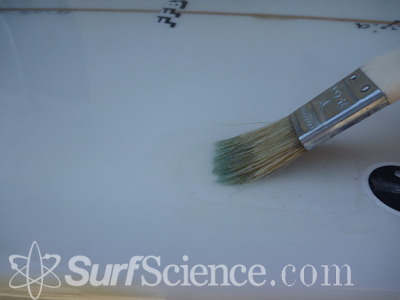 11. Apply Another Coat
After you have sanded the repair down flush with the shape of the surfboard, apply another coat of resin. This is sometimes referred to as a hot coat if you add a little more catalyst than you did the first time. Basically the resin will cure faster and it becomes hot as it does so. This isn't as strong of a coat but will let you put a nice looking finish on it.
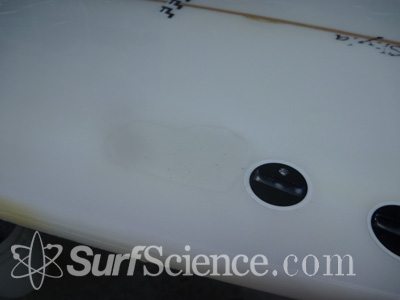
 12. Wet Sand
Once you have put the final resin coat on, use some wet/dry sandpaper to put a polish on the repair. put some water down and sand in a circular motion. A white paste will form as the dust mixes with the water. When you wash this away you will have a glossy & translucent coat.
13. Let Cure & Go Surf
Now you're all set. Let the repair sit for a day or two so the resin can completely cure. This will ensure it lasts longer. Do a final check to make sure everything is in good shape and go surf your newly repaired surfboard.
Conclusion
Fixing your own surfboard dings will allow you more freedom and flexibility. Rather than having your board tied up for weeks in the local repair shop, you will able to fix it and get back out in the water in a matter of days. Take your time, read the instructions carefully and remember that no matter how messy it gets, you'll be better at it the next time.


2 Comments